Faulty wiring, failed relays, or damaged components usually cause control board issues.
I’ve spent years repairing Whirlpool Duet dryers and teaching homeowners simple fixes. This guide on Whirlpool Duet Dryer Control Board Troubleshooting shows clear steps, safe tests, and real-world tips so you can diagnose problems fast and decide whether to repair or replace the control board.

Common symptoms of a bad control board
- Dryer won’t start while lights or display remain on.
- Cycles stop mid-run or controls become unresponsive.
- Random error codes, intermittent power, or rebooting.
- Display shows weird characters or completely blank.
These signs often point to the control electronics rather than mechanical parts. Whirlpool Duet Dryer Control Board Troubleshooting focuses on isolating board faults from simple issues like fuses or door switches.

Safety first and tools you need
- Unplug the dryer before touching any parts.
- Turn off the circuit breaker if you need to test live components.
- Use insulated tools and a quality multimeter for voltage and continuity checks.
- Have needle-nose pliers, nut drivers, a camera to document wiring, and replacement parts ready.
Safety cuts time and cost. When I work on Whirlpool Duet Dryer Control Board Troubleshooting, I always document connections and wear safety glasses.

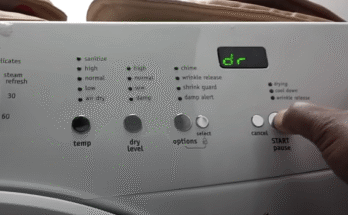
How to read error codes and enter diagnostics
- Note any blink codes or F- codes on the display. These are clues, not final answers.
- Many Whirlpool Duet models store service codes accessible to technicians via a service mode; check the model’s tech sheet for exact entry steps.
- If you cannot enter service mode, record visible error codes and behavior to narrow the fault.
Reading codes narrows the scope for Whirlpool Duet Dryer Control Board Troubleshooting and speeds repairs.
Step-by-step troubleshooting process
- Visually inspect wiring and connectors for scorch marks or loose pins.
- Reset power: unplug for 5 minutes to clear transient faults.
- Check household voltage at the outlet; low or unbalanced voltage can mimic control board failure.
- Test thermal fuse and door switch for continuity; these often cause no-start symptoms.
- Verify the motor and drive components can spin freely; mechanical stalls may overload the control board.
- Probe control board outputs with a multimeter to confirm voltage to relays, heater, and motor.
Follow these steps in order. Whirlpool Duet Dryer Control Board Troubleshooting works best when you rule out simple parts first.

Common control board problems and how to fix them
- Failed relays or triacs: Replace the board or swap the failed relay if repairable.
- Burnt traces or connectors: Clean and repair traces or replace the board for reliability.
- Cold solder joints: Reflowing solder can fix intermittent problems but is best left to skilled techs.
- Bad capacitors: Swollen or leaking caps are a clear sign to replace the board.
Fixes range from reseating connectors to full board replacement. For most homeowners, replacing the board is faster and more reliable than component-level repair when the board is visibly damaged.

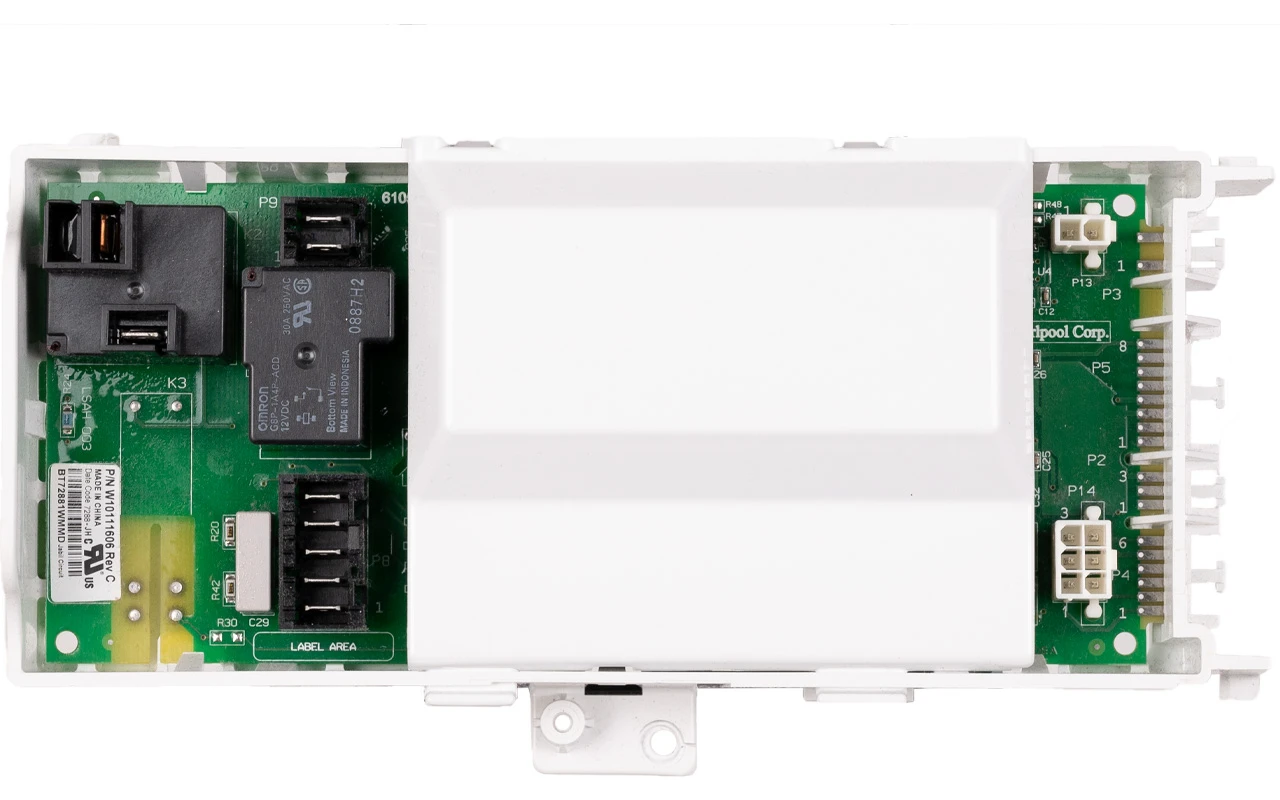
Testing and replacing the control board
- Label each connector and take photos before removal.
- Remove the control console and inspect the board for burned components or cracked solder joints.
- Test key signals: supply voltage to the board, ground continuity, and output voltages when a cycle starts.
- Order the exact OEM part number for your Whirlpool Duet model to avoid compatibility issues.
- After replacement, run a diagnostic cycle to verify operation and clear any stored codes.
In my experience, careful labeling and photos cut reinstall time in half. Whirlpool Duet Dryer Control Board Troubleshooting becomes straightforward with a methodical swap.

Software, firmware, and error code notes
- Some Duet models have firmware that affects diagnostics and behavior. Updating firmware isn’t common for dryers, but note any persistent software-like glitches.
- Persistent or strange error codes after a board swap can indicate wiring, sensor, or harness faults rather than the new board.
- Keep a record of codes and steps you took so you or a technician can follow the repair history.
Software issues are rare, but documenting helps prevent repeated troubleshooting loops in Whirlpool Duet Dryer Control Board Troubleshooting.

Preventive maintenance to avoid future control board problems
- Clean lint from the vent, lint trap, and blower housing regularly to reduce motor strain.
- Avoid overloading the dryer and balance loads for smooth operation.
- Keep the dryer in a dry, ventilated area to prevent moisture damage to the control board.
- Use a whole-home surge protector to protect sensitive electronics from spikes.
Simple care extends the life of the control board and reduces service calls. My clients who clean vents yearly see far fewer electrical failures.

Quick troubleshooting checklist
- Check outlet voltage and circuit breaker.
- Inspect fuses, thermal fuse, and door switch continuity.
- Look for burned wires, connectors, or board components.
- Reseat connectors and run a power reset.
- Test outputs from the control board to motor and heater.
- Replace the control board if tests show no output or visible damage.
Use this checklist during Whirlpool Duet Dryer Control Board Troubleshooting to stay organized and avoid missed steps.
Personal experience and common mistakes to avoid
- I once replaced a whole control board only to find a loose harness; always inspect connectors first.
- Another case showed a bad neutral at the outlet mimicking control board failure; always test the power supply.
- Don’t assume a blank display equals a dead board—check fuses and door switches first.
These real cases taught me to slow down and follow a checklist during Whirlpool Duet Dryer Control Board Troubleshooting to save time and money.
Frequently Asked Questions of Whirlpool Duet Dryer Control Board Troubleshooting
How do I know if the control board is bad?
If the dryer has power but won’t start, shows erratic behavior, or tests show no output from the board, the board may be bad. Rule out fuses, door switch, and wiring first.
Can I repair the control board myself?
Minor fixes like reseating connectors or replacing a visible capacitor are possible for skilled DIYers. For complex soldering or component-level repair, a trained technician is safer and more reliable.
How much does a replacement control board cost?
Parts typically range from moderate to high depending on OEM or aftermarket choices and your model. Expect parts plus labor if you use a technician.
Will replacing the control board erase error codes?
Replacing the board may clear stored codes, but if the underlying fault remains, codes will return. Use diagnostics to confirm that the root cause is fixed.
Is it worth fixing the control board versus buying a new dryer?
If the dryer is less than 8–10 years old and the issue is isolated to the control board, repair is often cost-effective. For older machines with multiple failing systems, replacement may be wiser.
Conclusion
Whirlpool Duet Dryer Control Board Troubleshooting is a stepwise process: observe symptoms, verify power and simple parts, test outputs, and then decide on repair or replacement. Tackle checks calmly, document wiring, and use a checklist to avoid missed steps. If you’re unsure, call a pro—safety and correct diagnosis save money. Try the steps above, leave a comment with your model and symptoms, or subscribe for more repair guides.