Most Speed Queen dryer faults are user-fixable with simple checks and basic tools.
I have spent years repairing and teaching dryer care, so this guide on Speed Queen Tumble Dryer Troubleshooting gives clear steps, real tips, and honest costs. Read on to learn how these dryers work, diagnose common faults, try safe fixes, and know when to call a pro. This article blends hands-on experience with practical advice so you can solve problems fast and avoid repeat trips from the repairman.

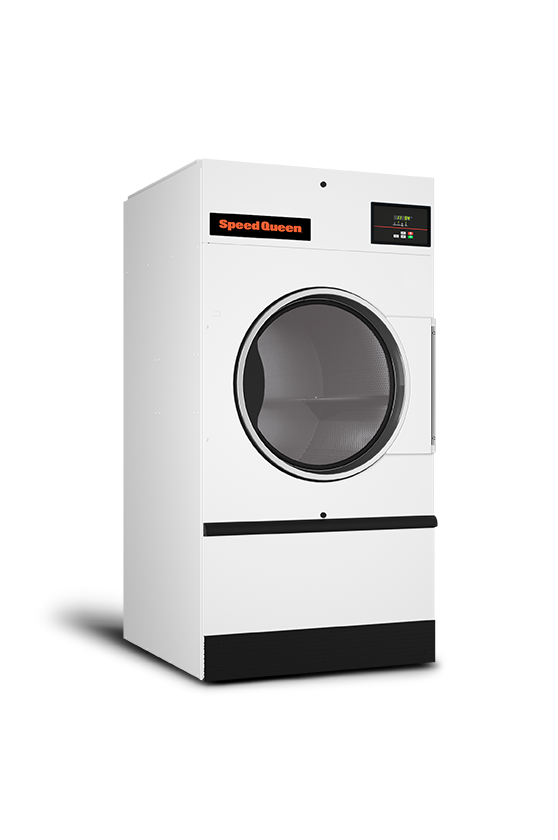
How a Speed Queen Tumble Dryer Works
Speed Queen tumble dryers use a timed or sensor-controlled cycle to remove moisture from clothes. They rely on a heating source, a drum, a blower, and sensors to read moisture and temperature. Common models use a moisture sensor or a thermostat to stop the cycle when clothes are dry. Knowing these parts helps with Speed Queen Tumble Dryer Troubleshooting because most faults map back to one of them.
Common problems and likely causes
Most repairs fall into a few groups. Below are common issues and what usually causes them.
- Dryer does not start
- Power supply, door switch, or main control fault.
- Dryer runs but does not heat
- Faulty heating element, thermostat, or safety cut-out.
- Dryer takes too long or never dries
- Clogged venting, restricted airflow, or a failing moisture sensor.
- Loud or unusual noises
- Worn drum bearings, idler pulley, or foreign objects in the drum.
- Drum not turning
- Broken belt, motor fault, or seized drum bearings.
- Error codes or flashing lights
- Sensor or communication errors; model-specific codes vary.
Speed Queen Tumble Dryer Troubleshooting usually starts with these checks and simple fixes.

Step-by-step Speed Queen Tumble Dryer Troubleshooting checklist
Follow this order to diagnose issues quickly. Work safely: unplug the dryer before opening panels.
- Confirm power and controls
- Check the wall socket and circuit breaker. Test with another appliance.
- Inspect the door and latch
- Ensure the door clicks closed. Replace a weak door switch if needed.
- Clean lint and vents
- Empty the lint trap after every load. Remove and clean the vent hose and exterior vent.
- Check airflow
- Run the dryer on air-only or timed cycle and feel air flow at the exit vent.
- Test heating
- If there is airflow but no heat, the heating element or thermostat likely failed.
- Listen for motor or drum issues
- Squealing or rubbing sounds point to bearings or the belt.
- Read error codes and consult the model manual
- Record flashing patterns or codes before resetting the machine.
This ordered approach saves time when doing Speed Queen Tumble Dryer Troubleshooting. If a step points to an electrical part, consider calling a trained technician.
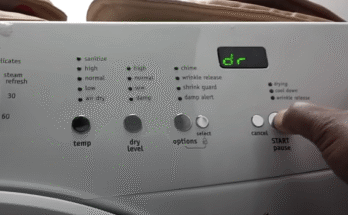
Speed Queen Tumble Dryer Troubleshooting: Error codes and indicators
Speed Queen models use different panels and code systems. Understand these basics.
- Flashing lights or codes generally indicate sensor or control faults.
- Persistent error codes usually need a service manual or tech lookup.
- No display but fault symptoms can mean a main board failure.
If you see an error code, note it exactly and try a power cycle first. Always check the model’s manual or the data plate on the dryer for code references. When codes repeat after resets, the issue is likely hardware and requires repair.

Maintenance tips to prevent common faults
Regular care prevents most Speed Queen Tumble Dryer Troubleshooting visits.
- Clean lint basket after each use to improve airflow.
- Vacuum the lint cavity and vent hose every few months.
- Inspect and clean the exterior vent and hood to ensure free airflow.
- Avoid overloading the drum; follow load-size guidance.
- Use dryer-friendly detergent and avoid clogging sensors with residue.
- Keep the dryer level to prevent wear on bearings and the belt.
A simple vent clean every six months cuts drying time and reduces fire risk. This small habit reduces the need for future Speed Queen Tumble Dryer Troubleshooting.
When to repair versus replace
Deciding to repair or replace can be simple when you consider age, cost, and reliability.
- If the dryer is less than 8–10 years old, repairs often make sense.
- If repair cost exceeds half the price of a new unit, replacement is wise.
- Frequent failures or control board issues suggest replacement for long-term savings.
- Newer models bring energy savings, which factor into the choice.
Weigh repair cost, appliance age, and how long you plan to keep the unit when doing Speed Queen Tumble Dryer Troubleshooting.

Parts, tools, and estimated repair costs
Knowing common parts helps you understand repair quotes.
- Common parts
- Heating element, thermostat, thermal fuse, belt, drum rollers, door switch, motor.
- Typical DIY tools
- Multimeter, nut drivers, putty knife, vacuum, and pliers.
- Rough cost ranges (parts only)
- Heating element: $30–$120
- Belt: $10–$40
- Motor: $80–$250
- Control board: $100–$400
- Thermostat or thermal fuse: $10–$50
Labor varies by region. Always get a written estimate and ask if parts carry a warranty before committing to a repair. This transparency makes Speed Queen Tumble Dryer Troubleshooting less stressful.
My experience with Speed Queen Tumble Dryer Troubleshooting
I once diagnosed a dryer that ran without heat. The homeowner already paid twice for a new element. I tested continuity and found the thermal fuse open. Replacing the fuse fixed the dryer, saving cost and time. Lessons learned:
- Always test multiple parts before replacing them.
- Clean vents first; many “failed elements” were air-flow problems.
- Keep safety front of mind: unplug the unit and discharge capacitors if present.
These small habits cut repeat calls and keep repairs honest. My hands-on work taught me that most Speed Queen Tumble Dryer Troubleshooting is about patience, good tests, and basic tools.

Safety and best practices
Safety must always come first when troubleshooting.
- Always unplug the dryer before opening panels.
- Use a proper multimeter and know how to test components.
- Replace thermal fuses and thermostats with OEM or compatible parts.
- Avoid DIY gas dryer work unless you are certified; gas connections are hazardous.
If you are unsure, hire a certified technician. Quick fixes should never risk safety.
Troubleshooting PAA-style quick questions
Here are short answers to common quick questions.
- How do I reset my Speed Queen dryer?
- Unplug the dryer for one minute and plug it back in. For models with a reset button, follow the manual steps.
- Why is my Speed Queen dryer not heating but the drum spins?
- That points to a heating element, thermostat, or thermal fuse failure or a broken high-limit switch.
- How often should I clean the vent?
- Clean the lint trap after every load and the vent system at least every six months, more often if you dry heavy loads.
- Can I run my dryer with a partially blocked vent for a short time?
- Avoid it; reduced airflow shortens element life and risks overheating. Stop and clear the blockage first.
- Are replacement parts easy to find?
- Speed Queen parts are available online and via dealers; use your model number to pick correct items.
Frequently Asked Questions of Speed Queen Tumble Dryer Troubleshooting
What should I check first if my Speed Queen dryer won’t start?
Check the power supply, circuit breaker, and the door latch. If power and door are fine, the start switch or control board may be at fault.
Why does my dryer run but clothes stay damp?
Poor airflow from a clogged vent or lint trap is the most common cause. Confirm vent airflow and inspect the moisture sensor.
How do I know if the heating element is bad?
Test the element with a multimeter for continuity. No continuity usually means the element needs replacement.
How often should I service my Speed Queen dryer?
Inspect vents and clean the lint trap every month; do a full vent cleaning and professional check every 6–12 months for heavy use. Regular checks extend appliance life.
Is it safe to DIY electrical repairs on a dryer?
Only perform DIY repairs if you are comfortable working with mains electricity and have the right tools. When in doubt, hire a certified technician.
What are the signs of a failing drum bearing?
Loud rumbling, scraping noises, or drum wobble indicate bearing wear. Replace bearings or rollers before they damage the drum.
Can sensor errors be cleared by the owner?
Power cycling sometimes clears sporadic sensor errors. Persistent sensor faults need testing and may require sensor or board replacement.
Conclusion
Speed Queen Tumble Dryer Troubleshooting is often straightforward when you follow a clear checklist and prioritize airflow, power, and simple tests. Small habits like regular vent cleaning and quick checks can prevent most failures and save money. Try the steps here, record any error codes, and call a technician for electrical or gas problems you cannot confidently fix. Share your results, ask questions, or subscribe for more repair guides and practical tips.