Percussion massagers have become a popular tool for muscle recovery, pain relief, and relaxation. Whether you are an athlete, fitness lover, or someone who spends long hours at a desk, these devices offer fast relief for sore or tight muscles.
One key feature of percussion massagers is the ability to switch massage heads, allowing for different types of treatment. But many users feel unsure about how to change these heads safely or what to do if one gets stuck. If you want to get the most from your device and avoid damage, learning how to properly replace percussion massager heads is important.
This article gives clear, step-by-step guidance on how to change massage heads, explains why the right head matters, and shares tips to keep your device working well. You’ll also learn about common mistakes, troubleshooting, and how to clean and care for your attachments.
By the end, you’ll feel confident switching out any massager head—without frustration or risk.
Why Replace Percussion Massager Heads?
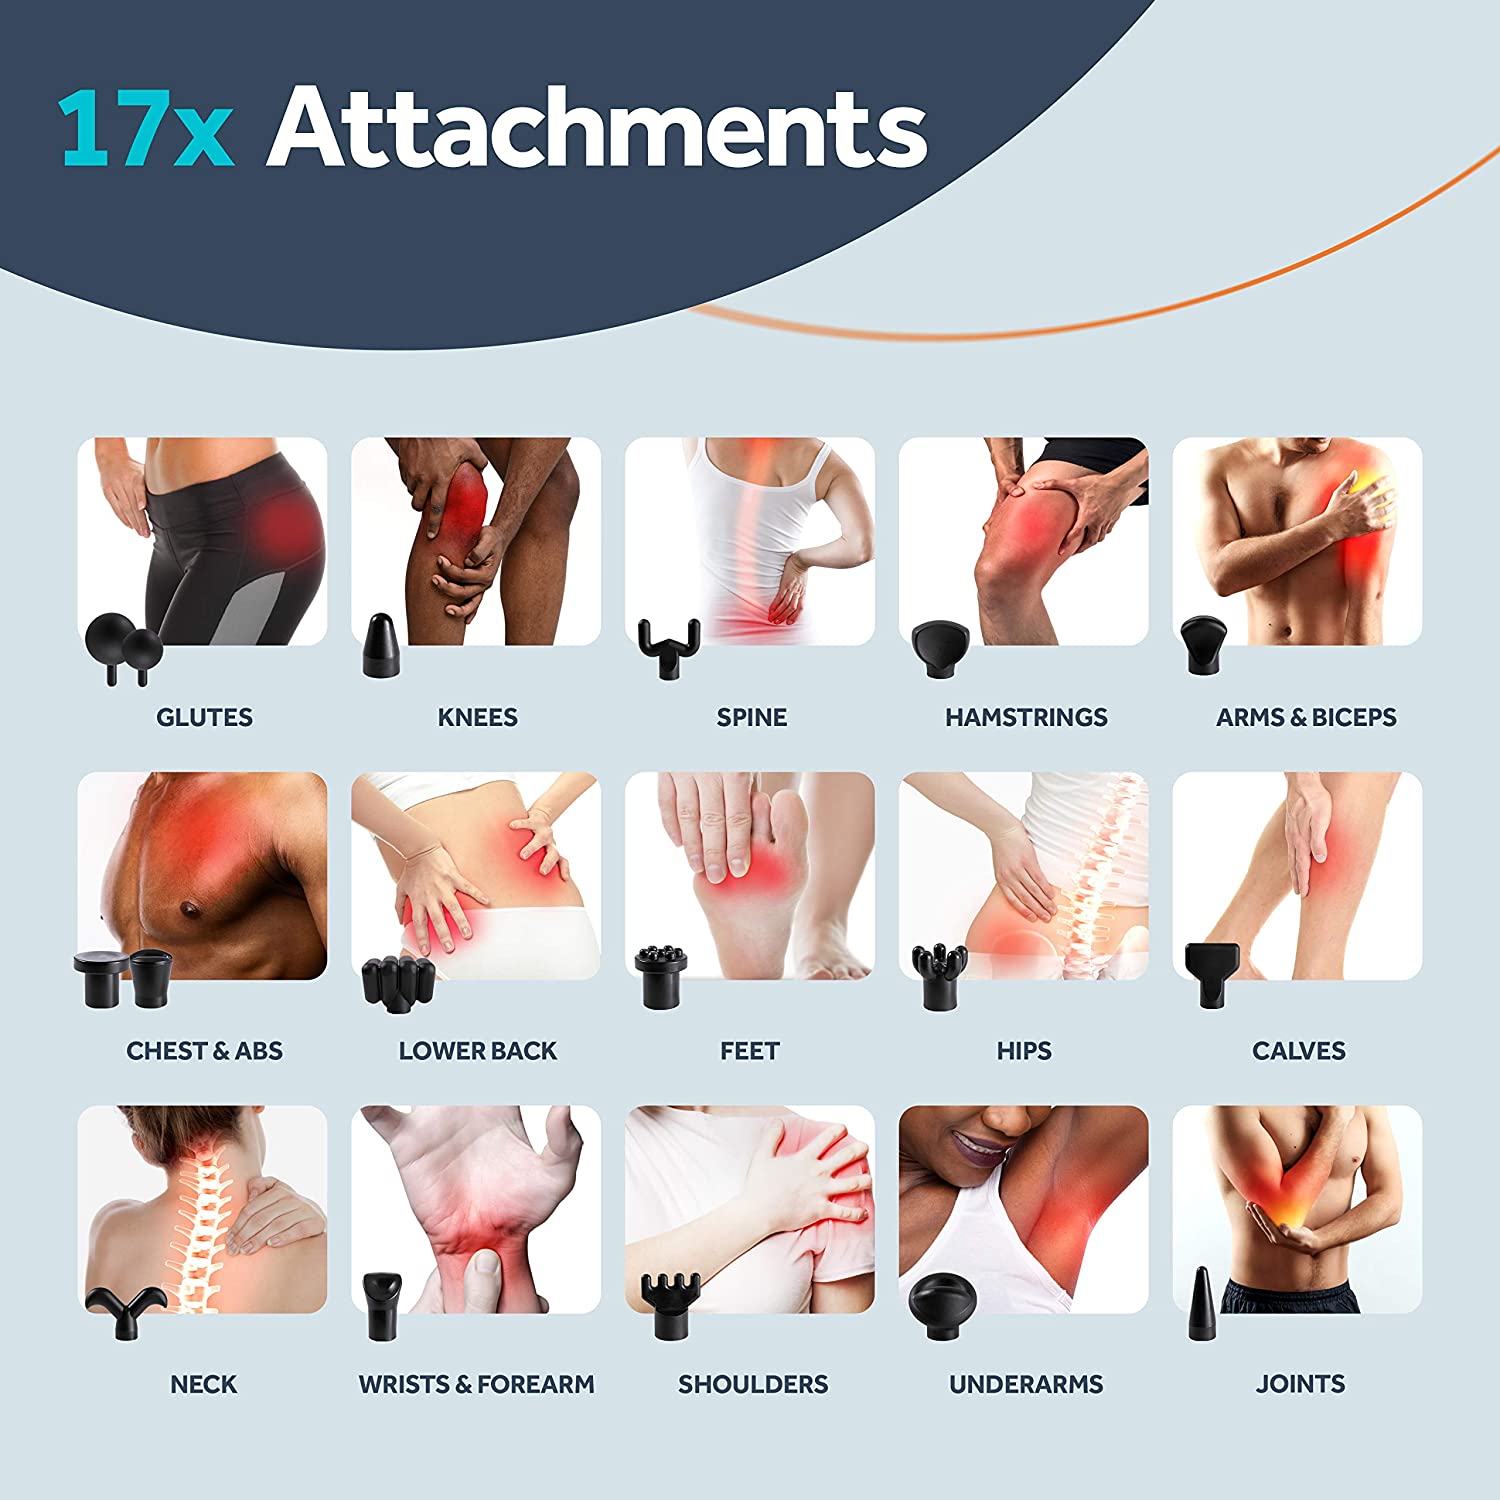
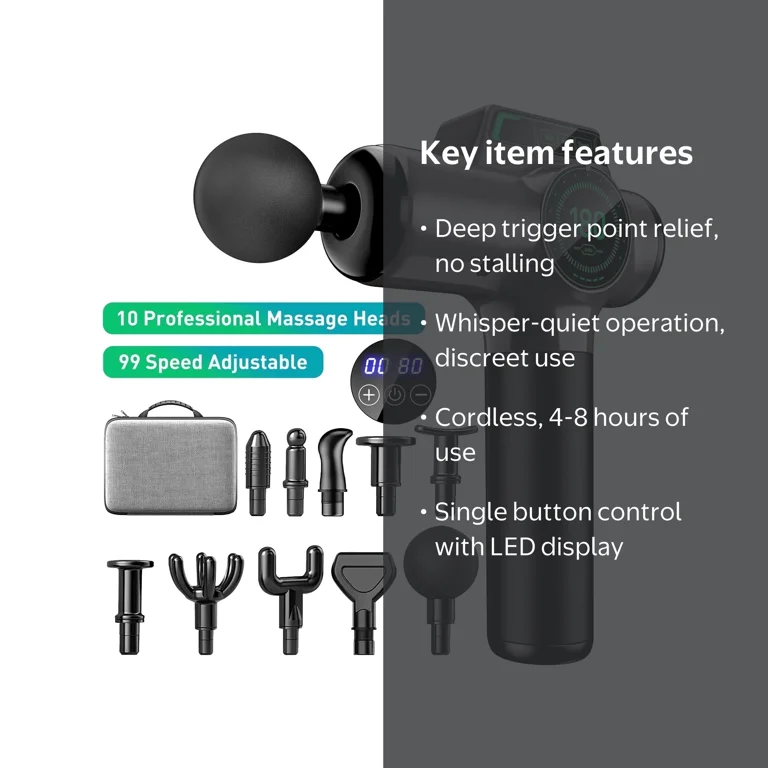
The main reason for changing the percussion massager head is to target different muscle groups or needs. Each attachment is designed for a specific purpose:
- Ball heads are soft and good for large muscle groups.
- Flat heads offer more direct, even pressure.
- Bullet heads focus on deep tissue or trigger points.
- Fork heads work well for the spine or neck.
Over time, attachments can wear out or collect dirt. Using the right head for each muscle group makes your massage safer and more effective.
Benefits Of Using The Right Head
Choosing the correct head means:
- Better results: You get deeper relaxation or faster recovery.
- Reduced injury risk: Wrong attachments can hurt sensitive areas.
- Longer device life: Forcing the wrong head can damage the motor or shaft.
Studies show that targeted massage with the right attachment can reduce muscle soreness by up to 30% compared to general massaging. This shows the impact of using the correct head, not just the device itself.
Types Of Percussion Massager Heads
Different massagers come with a mix of attachments. Knowing what each does helps you make the right choice.
| Head Type | Best For | Material |
|---|---|---|
| Ball | Large muscle groups (thighs, glutes) | Foam/Rubber |
| Flat | All-over use, sensitive areas | Plastic |
| Bullet | Trigger points, deep tissue | Hard Plastic |
| Fork | Spine, neck, Achilles tendon | Plastic/Rubber |
| Cushion | Joints, bony areas | Silicone |
Some brands also offer specialty heads for hands, feet, or face. Always check your manual for details.
When Should You Replace A Massage Head?
It’s not just about changing heads for different muscles. Sometimes, you need to replace a head entirely:
- Visible wear or cracks
- Lost elasticity or shape
- Unusual noise or fit issues
- After long-term use (6-12 months of daily use)
If a head feels loose, squeaks, or doesn’t deliver the same results, it’s time to replace it. Using a damaged head can harm your device or even cause injury.
Step-by-step: How To Replace Percussion Massager Head
Changing the massage head is simple, but there are a few things to keep in mind. Follow these steps for most models:
1. Turn Off And Unplug The Massager
Always turn off the device before changing the head. If it’s rechargeable, switch it off completely. For plug-in models, unplug from the wall. This keeps you safe and protects the device.
2. Remove The Current Head
- Hold the device firmly with one hand.
- Grasp the attachment with the other hand.
- Pull the head straight out, not at an angle.
- If it’s stuck, twist gently while pulling.
Tip: Never use tools or force. Most heads are designed to come off with hand pressure.
3. Inspect The Shaft And Head
Check for dirt, hair, or signs of wear. Wipe with a clean cloth if needed. If there’s debris, clean before attaching the new head.
4. Choose The Right New Head
Pick the attachment that fits your needs—ball for large muscles, bullet for deep knots, etc. Make sure it’s clean and in good shape.
5. Attach The New Head
- Align the hole of the new head with the shaft.
- Push the head straight on until it clicks or feels secure.
- Don’t twist unless the manual says so.
6. Test The Fit
Turn the device on at the lowest speed. If the head wobbles or makes noise, turn it off and try again. It should feel stable and balanced.
7. Store Spare Heads Safely
Keep unused heads in a clean, dry place. Some brands include a storage case—use it to avoid dust and damage.
Common Problems And Solutions
| Problem | Possible Cause | Solution |
|---|---|---|
| Head won’t come off | Debris or tight fit | Gently twist and pull; clean shaft |
| Head wobbles | Not fully pushed in | Remove and reattach, press firmly |
| Clicks or noise | Loose or damaged head | Check for cracks; replace if needed |
| Head stuck | Old lubricant or material swelling | Use a warm, damp cloth to loosen |
Tips For Safe And Easy Replacement
Replacing a percussion massager head should not be hard, but a few extra tips can make it smoother:
- Let the device cool down before touching the head, especially after long use.
- Don’t use oil or grease on the shaft—this can attract dirt.
- Read your manual for any special instructions (some heads screw on, most just push in).
- Replace heads regularly if you use lotion or oil, as buildup can weaken the material.
- Mark the heads if you share your device (use colored tape) to keep things hygienic.
How To Clean And Maintain Massage Heads
Clean attachments last longer and are safer for your skin. Here’s how to do it right:
Cleaning Steps
- Remove the head from the device.
- Wipe with a damp cloth or alcohol wipe. Avoid soaking.
- For foam or rubber heads, use mild soap and water. Air dry.
- For hard plastic heads, a quick wipe is enough.
- Avoid harsh chemicals—they can damage the material.
How Often To Clean
- After every use: If you use lotion, sweat, or share the device.
- Weekly: For personal use without lotion.
- Monthly: For rarely used heads.
Deep Cleaning Tips
If you notice odor, stickiness, or residue:
- Soak the head (if material allows) for 10 minutes in warm, soapy water.
- Use a soft brush to remove buildup.
- Rinse and dry fully before reattaching.
Choosing Replacement Heads: What To Look For
Most massager heads are brand-specific, but some universal options fit several models. Here’s what to check before buying new ones:
- Compatibility: Match the shaft size and type to your device.
- Material quality: Look for durable foam, silicone, or hard plastic.
- Ease of cleaning: Smooth surfaces are easier to keep hygienic.
- User reviews: Check for fit and comfort.
- Brand reputation: Third-party heads can be cheaper but may not last.
Cost Comparison
To help you decide, here’s a quick look at typical prices:
| Attachment Type | Brand Name Price (per head) | Third-Party Price (per head) |
|---|---|---|
| Ball | $10–$20 | $5–$12 |
| Flat | $8–$18 | $4–$10 |
| Bullet | $12–$22 | $6–$14 |
| Fork | $10–$20 | $5–$12 |
| Specialty | $15–$30 | $8–$18 |
Pro tip: While third-party heads are cheaper, always check if they fit your exact model. A poor fit can make the device noisy or even break it.
Mistakes To Avoid When Replacing Massage Heads
Even experienced users sometimes make errors that can damage the massager or reduce its life. Here are some things to watch out for:
- Forcing a head: If it won’t go on, check alignment. Never use tools.
- Ignoring fit: Loose heads can cause noise or fall off during use.
- Not cleaning first: Dirt can cause attachments to stick.
- Using incompatible heads: Only use heads designed for your device.
- Switching heads while on: Always turn off the device first.
Many people overlook the shaft’s condition. If it’s bent or dirty, attachments won’t fit right. Regular checks can prevent bigger problems.
Troubleshooting: What If The Head Gets Stuck?
Sometimes, a massage head may get stuck and refuse to budge. Here’s how to handle it safely:
- Turn off and unplug the device.
- Wrap a towel around the head for a better grip.
- Gently twist while pulling straight out. Do not wiggle side to side.
- Apply a warm compress to soften any dried sweat or lotion.
- Use rubber gloves for extra grip if needed.
- If it still won’t come off, stop and check your manual or contact customer support.
Never use pliers or sharp tools, as these can damage both the head and the shaft. If you push too hard, you risk breaking the internal mechanism.
How Often Should You Replace Massage Heads?
There’s no fixed rule, but most experts suggest:
- Every 6–12 months for daily users.
- Every 1–2 years for occasional users.
- Immediately if you see cracks, flattening, or changes in texture.
Some brands include a recommended replacement schedule in the manual. Regular replacement ensures hygiene and keeps your massages effective.

Safe Storage And Travel Tips
Proper storage extends the life of your attachments:
- Keep heads in a case or pouch to protect from dust and dirt.
- Avoid direct sunlight—UV light can weaken foam or rubber.
- Do not store in damp places, as moisture leads to mold.
- For travel, use a hard-shell case to prevent crushing.
If you share your device at the gym or with family, clean heads after each use and store them separately.
Real-world Example: Replacing A Stuck Head
A common scenario: You’ve just finished a long massage, and the ball head won’t come off. Instead of pulling harder, try this:
- Let the device cool for 10 minutes.
- Wipe around the base with a warm, damp cloth.
- Use a twisting motion while pulling straight out.
- If it still won’t budge, leave it for another 15 minutes, then try again.
Many people make the mistake of panicking and using tools. Patience and a little warmth usually solve the problem.
The Science Behind Attachment Design
Each head shape is based on research into muscle anatomy and pressure points. Studies have found that:
- The ball head spreads force, reducing pain and risk of bruising.
- The bullet head can reach 30% deeper into tissue than standard heads.
- The fork head avoids bones, making it safer for the spine.
This design science is why using the right head for the right muscle matters. For more about the science of massage, see the Wikipedia entry on massage.
Two Overlooked Insights For Beginners
- Replacement Timing Matters: Many users don’t realize that old heads lose their ability to transfer vibration effectively. Even if they look fine, a worn head may make your massage less powerful or uneven. Mark the date you start using a new head for reference.
- Material Sensitivity: Some people react to certain plastics or foams. If you notice skin irritation, switch to a silicone or hypoallergenic head. Not all brands offer these, but it’s worth checking if you have sensitive skin.
Frequently Asked Questions
How Do I Know If A Massage Head Is Compatible With My Device?
Most heads are model-specific. Check your massager’s manual or the brand’s website for a list of compatible attachments. Universal heads are rare, so always confirm measurements and shaft type before buying.
What Should I Do If The Massage Head Squeaks Or Clicks After Replacement?
Noise usually means the head isn’t fully attached, is damaged, or the shaft needs cleaning. Remove the head, clean both the shaft and attachment, and reattach firmly. If the noise continues, check for cracks or wear.
Can I Use Third-party Or Off-brand Attachments?
Yes, but only if they’re listed as compatible. Third-party heads can be cheaper but may not fit perfectly. Poor fit increases noise, reduces massage effectiveness, and may void your warranty.
How Often Should I Clean My Massage Heads?
Ideally, after every use—especially if you use lotion or sweat a lot. At minimum, clean weekly for regular users. If you share your device, clean before and after each use.
Is It Safe To Replace Heads While The Device Is Charging?
It’s best to avoid this. Always turn off and, if possible, unplug the device before changing attachments. This prevents accidental activation and keeps you safe.
Replacing percussion massager heads is easy once you know the right steps. By following these tips, you’ll keep your device working well, your muscles feeling great, and your investment protected for years to come.